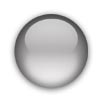
Creating Aqua Images in Adobe PhotoshopUsing these techniques you can aquify almost any shape. In this tutorial we will aquify a circle. There are three characteristics that set an 'aqua' image apart from a flat image:
|
|
1. Creating GlareCreate a new window with a transparent background. Tip: Even though OS X icons have a maximum area of 128x128, its best to start large and reduce the image size later. A safe size to start at is 256x256 pixels. File: New...
|
|
|
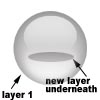
With the ellipse still intact create a new layer. Make sure this new layer, "Layer 2", is selected in your Layers Window. Layer: New: Layer...
|
 |
|
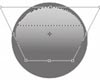
Use Distort to manipulate the gradient fill in "Layer 2" by pushing the bottom edges of the in towards eachother and smooshing the entire gradient in so that it leaves a small gap between itself and the rim of the main circle. Edit: Transform: Distort |
 |
|
After you get the gradient to look right create an exact Duplicate of "Layer 2" and label it "Layer 3". Layer: Duplicate Layer... Use Flip Vertical to turn "Layer 3" upside-down and then move Layer 3 until it is in about the same position at the bottom of the circle as "Layer 2" is at the top of the circle. Edit: Transform: Flip Vertical Use Gaussian Blur to blur "Layer 3" until it looks blown out and softer than "Layer 2". Top: A radius of somewhere around 10 pixels usually works for the Gaussian Blur. Filter: Blur: Gaussian Blur...
|
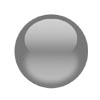 |
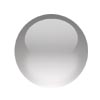
2. Proper LightingSelect "Layer 1" and use the Lighting Effects filter on it. You will have to play with the light settings and direction until you get something that looks right. Tip: It's always a good idea to make your light source in an aqua object come from the bottom up. Filter: Render: Lighting Effects... |
 |
|
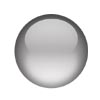
Add an Inner Glow to "Layer 1". Adjust the inner glow settings so that the glow color is black. Change the Blend mode to Mutiply. Then adjust the Size and Opacity of the glow until you get something that looks right. Layer: Layer Style: Inner Glow
|
 |
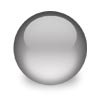
3. Drop ShadowThere are two different types of drop shadows you may put on an aqua object. Chose the one which is most appropriate for your design. |
|
|
 |
|
Tip: After you get your image looking the way you want Merge Visible on everything, select the merged image, Copy it, Create a New Window and Paste your image there. This will eliminate all extra space around your image. You can then adjust the image size using: Image: Image Size... |
|
|
This article was written by Matthew Bice. Visit his website at IheartNY.com. |